 It was worth the drive to one of the highest annual star parties in Europe on the weekend of September 25–28 at the grassy mountain meadow of Berg above the small town of Greifenburg in southern Austria. Looking at the weather report I arrived Friday afternoon. Known as the Internationales Teleskoptreffen, or ITT (International Telescope Meeting), the event took place in and around the Emberger Alm Hotel at 1,700 meters (5,600 feet). It was the ITT’s 30th annual meeting, and its 19th at this location. There was plenty of accommodation available, the very astro-friendly Emberger Alm Hotel, several cabins close by and a large alpine meadow with trailer and tent areas (really fun).
The site is well known for astronomy. The time before dark was filled by discussions among enthusiasts, who came from as far as Belgium, Germany, and Holland. On Friday one member offered his profound knowledge doing astro-photography in a light polluted city, including how to process astronomical images. He covered in one hour the full spectrum from webcam to DSLR and CCD and not missing one major topic. Great exercise in being concise.
By 9 p.m. everyone was out observing or photographing. Several dealers set up telescopes for display and demonstrations. Amateurs were happy to show off celestial objects on their telescopes, so that one could wander between views of various Nebula, the Andromeda Galaxy, and other highlights. Such exchanges of experiences, knowledge, and technical tricks play an important role in making a star party a success.
During daytime, some people hiked the mountains, while others slept in the sun, or did preparation for the coming night. Some displayed their equipment and Wolfi Ransburg had his shop open. Astronomy conditions very quite ok, reasonable the first night with a few clouds, less desirable the second night with occasional openings and brief drizzle, but very good until 1 pm the third night. During the day, the weather was very pleasant.
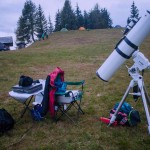
I opted for observing only and used a computerized German equatorial mount (GEM). However, I was quite impressed by Ben’s Dobson (see picture at the left). He is a human GoTo picking up a nebula in a few seconds. What sets his Dobson’s alt-az mounted Newton apart from those I had come before is that it was BIG and he had top of the line TeleVue Ethos eyepieces. The bigness was of design–John Dobson felt, and feels, that the way to get people hooked on the wonder of the universe is to kick them in the brainpan with the view of some celestial object through a great big telescope. True. Impressive view on Andromeda and Cyrus Nebula. I really hate myself having not been a more active hobby astronomer, while I lived in the Bay area. Northern Europe’s weather and sky condition are quite often problematic. We went regularly in the 80s and 90s to the Yosemite National Park over the weekend and very often in other National parks of California, Utah, Arizona, Oregon, Washington state but mostly for hiking and backpacking.
Anyway. Here some pictures of the 30th International Telescope Meeting in Austria last weekend. Really an initiative for my lazy bum to get out there more often in a search of a dark sky.I learned a lot by talking and watching experienced amateurs.
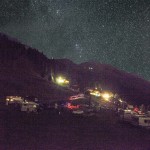
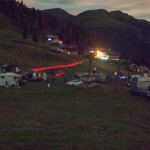
- Looking down to the red light district (merged)
- My equipment – rather small
- in comparison to this Dobson
- Really nice camp site on a hill
- The hotel in the background
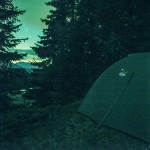
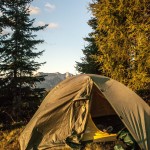
- Tent site with a view – far apart from the trailers
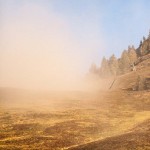
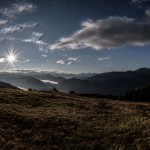
- Morning- looking down the valley
- Before the sun burns the fog away
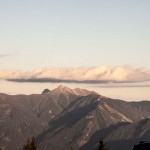
- Morning at the mountain
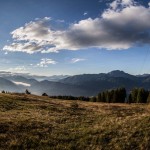
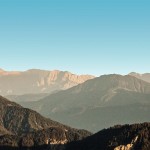
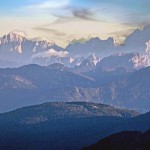
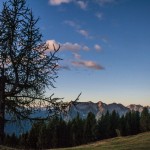
- Evening panorama
- Evening panorama
- Evening panorama
- Morning
- Morning
- HDR-Attempt-Fuzzy-Clouds
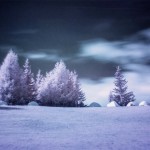
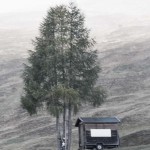
- On the way home in Bavaria Infrared
Field Trip Survival Guide
Hopefully your collection of astronomy stuff is better organized than mine. I don’t make dark sky trips often enough to remember everything off the top of my head, so I made a checklist:
Checklists download here:
- You go out for a single night or star party – Star Fair Telescope_Trip_Checklist
- You do a family trip with wife kids and dog, lets say to South West France. You managed to direct a little bit to areas with lots of nature and history bit little light pollution –Multiple Purpose Camping and Hiking Checklist, with a very small astronomy footprint
It’s finally time. You’ve checked your gear. You’ve practiced everything you need to do. You’ve bought spare parts. You’ve found the perfect dark sky site. You’ve found your astrophotography targets. You’ve checked the weather. You’ve even planned a few other things to do while you’re enjoying some peace and quiet. Double check everything. Triple check everything. Now go!
Dark skies,
Some of the essentials I double check for proper operation in my gear checklist:
- Telescope(s) – make sure the lenses are clean, focuser work, and you have all their parts.
- Telescope(s) attachments, dovetail, Finder & Telrad
- Tripod complete with all screws
- All auxiliaries (hand box, cables, USB hunbs”
- Power tank, batteries, power cables, Power Supply AC/DC
- Camera, their mounts including fast release, cables, power adapters, and memory cards (full?).
- Lens(es) – make sure the lenses are clean,
- A/C power adapter for DSL and CCD and auto guiding camera,
- Laptop with power supply software proven
- Other stuff: folding table, chairs, flashlights, camping lantern, etc.
- Dont be light on clothes and rainprotection
Get Spares
- USB cables
- Power inverters
- Batteries (GPS, cameras, flashlights, etc.)
- Flashlights
Practice
You absolutely do not want to waste time once you finally get out to pure darkness. You need to know how to do every step of your astronomy and astrophotography process before you go. If you’re into astrophotography (or think you might be), you need to learn how to accurately polar align your telescope fast. Drift alignment is not anymore the most popular way to align your mount with the heavens. There are lots of drift alignment tutorials online. A quick Polar alignment tutorial. Take time to focus. Learn how to operate your equipment in the pitch dark with gloves.
Pick a Place
Almost by definition of a dark sky site, you’re out in the middle of nowhere. Compare each site’s light pollution to your back yard’s. You need to consider the pain of getting to the dark site compared to the gain of the skies there.
Some things to think about when you’re looking for a site:
- Is power available? At many places it won’t be. I usually try to find a place that doesn’t have power available – they usually end up being darker.
- Are there places to stay near by? This could be hotels or camp sites, but you’ll need some place to sleep.
- Are water & toilets available?
- Other stuff: Food, gasoline, access (i.e. do I ruin my BMW to get there?)
- Other other stuff: What else is there to do there? Some people are happy to sit by their telescope & in their tent. Others aren’t. If your non-astronomer significant other is joining you, don’t screw this part up.
Pick Targets
If you are certain you can take a good picture of a globular cluster, go for something with some nebulosity in it. Messier 42, the Orion Nebula, is a great choice for a first attempt at a nebula. It’s bright enough that you can see quite a bit of nebulosity in even unguided 30 second exposures and has bright stars you can autoguide on right in the middle of the nebula. If you do a good polar alignment, a series of 30 second unguided exposures of M42 can make for a “wow” photo. A favorite summer target of mine is the Messier 8/Messier 20 complex shown below.
Pick a target that’s within your reach based on your equipment and skill level. Set lofty goals (“I’m going to shoot a great photo of M20″), but if you set goals that are impossible (“I’m going to image a planet in another galaxy”) you won’t be happy.
Don’t overestimate how many photos you’ll be able to take. If you want to take a series of 20 photos at 5 minutes each of a deep sky object, that will easily take two hours of imaging once you include all the image downloading, camera rest time, and other adjustments. You can probably plan on 30 minutes to an hour of focusing and image framing before you even start that series. I typically plan on two or three objects a night. Depending on the object, I may shoot the same thing for multiple nights. It’s good to have backups in case clouds cover your primary target or you didn’t realize that a mountain will be in the way. Take your time for each target and get the images you set out to get.
Plan Your Activities
I typically plan to stay awake all night while I’m imaging. The longest nap I ever feel like taking at night is about a few hours. As you can imagine, that will made me tired the next day. I try to get to sleep just before the sun rises. By the end of your trip, you’ll be dead tired. Be safe when getting back to civilization. I always plan on being well rested before driving home. It’s tempting to load up your car as soon as the sun comes up on your last morning, but please take your time & get home safely.
Check the Weather
You’re taking a trip to the middle of nowhere to view and take pictures of the stars. You can’t see them if it’s cloudy. Your success can also be hampered by winds or a full moon covering your favorite nebula. In general, I look for clear skies with stable air masses and time around the new moon. Here are some weather-related web sites I check out when planning a trip:
- Weather Channel www.meteoblue.ch
- Clear Sky Charts calsky.com
- Sunrise, sunset, moonrise, moonset and moon illumination
Clothing
This time, it was cold and damp. The first principle of keeping warm is to wear more clothing. If you are not so bundled up that your motion is impaired, you’re not bundled up enough. I accumulated, over a period of years, skiing, backpacking and hiking my warm clothing. For temperatures below freezing I may wear at least pairs of leggings, two to three warm pairs of socks in my oversized boots, and three layers of warm stuff under my jacket. As the temp gets lower, or as the wind picks up, I add headgear, gloves, and other body and leg clothing layers as needed.
Boots: Currently I use good hiking leather boots with thick padding. The U.S. Army makes two types of winter boots, each of which is very warm — a “wet cold” variety that comes in basic black, designed f or temps down to -20 F (fondly known as “Moon Boots”, because their insulation makes them somewhat bulbous); and a “dry cold” variety that comes in basic white, designed for temps down to -65 F. The Army boots are highly recommended, should you come across any of either type.
Socks: wool is best, mostly-wool is next best, and nothing else is nearly the same. Don’t wear cotton. Cotton is for keeping cool in the summer! Its insulating value is less than that of most synthetics.
Leggings: some year, spend the money to get good wool long underwear or thick polypropylene legging. I have found even tight legging to be warm, with some warmth when wet though with less wet-warmth than wool. Bike pants are O.K. for an outer layer if the weather is wet.
Chest: alternate tightly woven layers with loosely woven layers, so as to lessen convection between layers.I have spent real money on a Jack Wolfskin Nano-materia, and it worth any buck in summer nights (also cold here) and winter. At least one sweater should be a turtleneck. The jacket should have a drawstring at the bottom and the bottom should be below your buttocks. Insulated pockets are a desirable plus. The neck should be adjustable so as to allow you to tighten it so as to prevent air loss regardless of whether the hood is up. Most truly warm coats have a hood, which offers much better cover than a hat. The best hoods have a drawstring around the face opening, not around the neck. North Face brand does all these things right.
Head: A ski cap under the hood is necessary on only the coldest nights. Take one with you. They’re fairly inexpensive, even the woolen ones. Yes, that means you cover your cheeks and forehead with the ski cap, if needed. These caps also cover the neck.
Gloves: go to a store that specializes in backpacking and bicycling gear and get a pair of gloves that have the ends of the fingers cut out, and they’re wool. You could cut the distal portions of the fingers off of any old pair of gloves, but you will like the non-fraying toughness, fit, and warmth of the store-bought ones. And get an over-sized pair of ski mittens, into which you can stuff your hands, gloves and all.
Tent: I have a light weight tent and an old feather sleeping bag, which I used for backpacking for that occasion. I you cuddle in your tent after in the cold for hours this makes all the difference. But keep it dry. One useful source of information about this is “Winter Hiking and Camping”, a book by John A. Danielson. Please note that I have accumulated these items over a number of years in all sorts of activity — sort of like accumulating gizmos for telescopes , I guess.
Here some pictures after the ITT with photo mount, iOptron Skytracker and DSLR (Sigma 17-70 f2.8-4.0 and Tamron 70 – 300 f4.0-5.6) from Michael (gustello)
https://www.dropbox.com/sh/2qwhfhq5uxt0tty/AABaCcg8xgArKhADz863Khj9a?dl=0
www.astrobin.com:
http://www.astrobin.com/users/gustello/
http://www.astrobin.com/users/fallenangel/


