
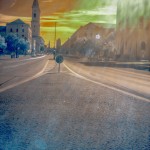
A few days ago, I began experimenting with infrared, or IR, photography (mostly city landscapes). Besides normal photography, I am astro-photographer with a Canon 60Da camera. All I needed was an Hoya ND72 infrared filter. To sum it up, for me the 60Da covers infrared light quite nicely, despite contradictory remarks. I am still a beginner when it comes to IR photography, and am constantly amazed at some of the stunning IR images that others produce. Infrared photography shares a lot of philosophy with astrophotography – patience, careful planning, accurate execution and lots of post-processing with Photoshop. Although many already be experts, I hope some find these thoughts and experiments useful and the pictures motivating. Essentially I went on a bike today to discover how Munich looks if we could see in infrared.
-
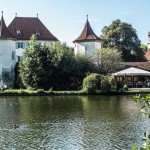
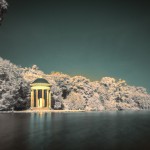
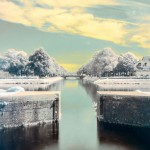
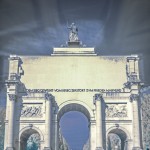
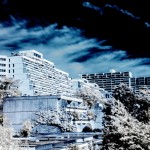
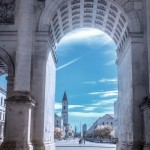
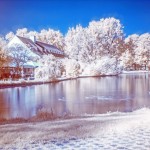
- I started close where I live – between to castles
-
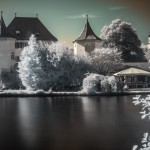
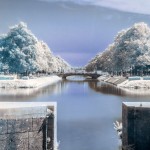
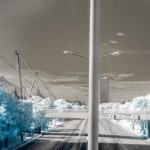
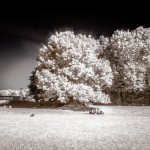
- View infrared – sitting people stay
-
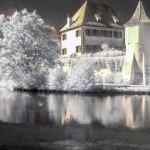
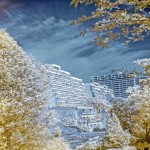
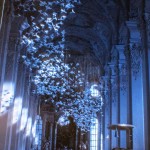
- Blooming effect on green trees. Moonshine on Building
-
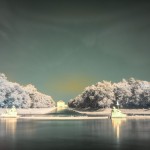
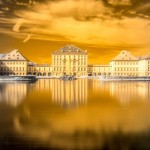
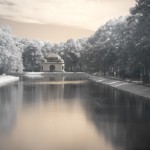
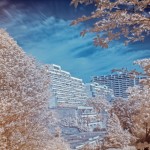
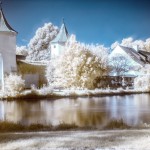
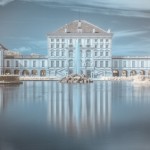
- Nymphenburg from the back side
-
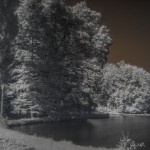
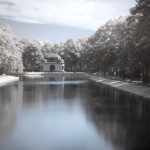
- Inside the park
-
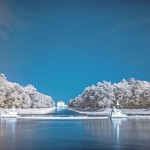
- Sunny day almost like winter
-
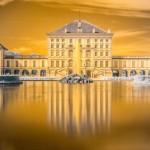
- Nymphenburg from the front side
-
- Different view (50 mm lens)
-
- Turn aound with 28 mm lns
-
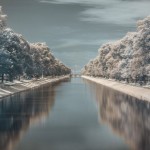
- Along the canal, again 50 mm lens
-
- Very far away Nymphenburg again
-
- From same bridge other direction
-
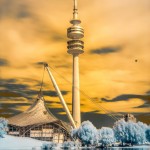
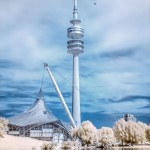
- Then to the Olympia park
-
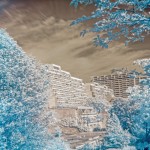
- Olympic village – a quiet place within noisy Munich
-
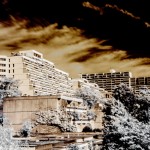
- Nadistr. 14. Lived there in the eighties Remarkable architectural concept unfortunately badly supported by Munich city
-
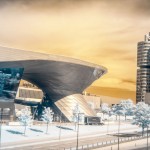
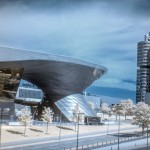
- BMW Museum
-
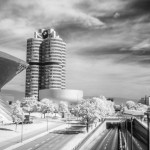
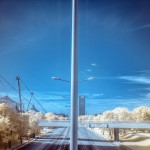
- Traffic discarded by long exposure in bright sunlight
-
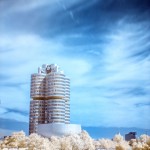
- A lone high rise building. Majority in Munich opted fortunately for a strict 7 story building code.
-
- Then Schwabing. – View to famous Leopoldstr. Architectural destroyed from the 70’s to the 90’s
-
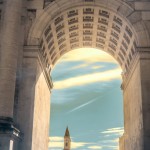
- Seen from the other side, Munich’s showcase boulevard was planned by Leo von Klenze on the orders of Ludwig I
-
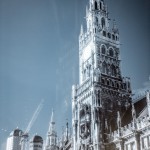
- Flares

Visible-spectrum and near infraredbbbbb
The figure on the side is the representation of the wavelengths of different type of lights, the human eye can “see” only the waves between 400nm and 700nm, we call visible light. Above 700 nm starts the Infrared Radiation: (IR is between 1000nm-10000nm), basically heat waves. The near infrared light we are interested in is between 780nm-1000nm can only seen by the camera chip, but only what the IR cut filter lets pass (or if it is replaced by clear class. A fast IR capable camera needs only 2 seconds with an aperture of f/8, ISO 200 and an RG 780 filter. I use a Canon 60 Da (for astronomy to see red H-alpha nebulas better) with an modified IR cut filter to let 656 nm pass. Since filter curves are not sharp, the Canon 60 Da is a bit more IR friendly, than lets say mv 5D Mark II. I do need to pinch up the ISO to 400 with an RG 720 and exposure few seconds longer time. That is more of an advantage than a problem. Wit both exposures you need a tripod, with an DLSR anyway, and, IR photography is not suitable for impatient. More often than not, I use minimum aperture of f/22 and 30 seconds exposure to get the gray filter effect – moving cars and people disappear. Actually you get a mor careful photographer this way it trains your eye and you get more choosy before you take a picture. I highly recommend to start with an RG 720, the blooming effect is already quite visible but there are still some colours – shades of brown, if you used green for the withe balance. This can easily changed with Photoshop to a more real or surreal colour.
Testing what you have got.
-

- Canon 5D, ISO 400 f/22 30s
-
- Canon 10D, ISO 400 f/22 30s
-
- Canon 60Da, ISO 400 f/22 30s
-
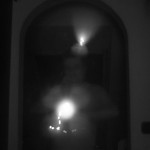
- IR test with an remote control on 60Da ISO 400 f/22 30s
The two factors to consider in an infrared filter are; the cutoff wavelength (when the filter starts to block light, which are the numbers you’ve listed in your question) and the sensitivity of your camera to IR.Hhigher wavelengths require either a more sensitive camera or a significantly longer exposure to produce a usable image. All digital sensors are naturally undesired sensitive to infrared (and UV) for normal visible-light photography disturbing picture and automatic focussing. DSLR have therfore an IR cutoff filter in front of the sensor.
The easiest way to test how sensitive your camera is to infrared is to point an infrared remote control at it and take a picture of the IR emitter on the remote control while pressing a button on it. The brighter the spot you see in the picture, the more sensitive the camera is to IR, and the higher wavelength of filter you can use with reasonable exposure settings. Here an test with my three Canon Cameras I own. The 60Da came out best. I
In summary there are four major groups of IR filters:
- 830nm – Deep blacks. Very contrasty in B&W.
- Hoya R72/Wratten 89b /720nm – The most ‘common’ choice. Good all-around tone range, but less saturated than a 665nm filter.
- 665nm – More saturation and color range. B&W will be less contrast than the 720nm.
- 590nm – Vibrant, intense colors. less over-all contrast. More possibilities for interesting surreal color shifting in post.
A 590nm image make absolutely beautiful portraits of skin with porcelain perfection. I would go for the 720 nm, any longer (800s and you’re limited to pure black and white – i.e. you get no colour response. Any shorter (500-600) and you start to lose some of the IR look, that is to say the very dark skies and glowing vegetation.A 720nm filter is a good choice for a first IR camera as you can get the look of any of the other filters (with a bit of extra post production) so you can decide which look you like best.Well, the IR Filter function is cut The cut-of wavelength reflects he number the filter. In other words, the IR filter let pass the wavelengths (colors) over the XXXnm. So the colors under the XXXnm will not be seen for the lens, but over XXXnm does. As we can see, red colors have 610 to 780 nm of wavelength and in the market there are filters from 650nm to 1000nm. A very good source of information is lifepixel.
SHOOTING
Attach the filter to the lens and use a tripod. Use a good tripod, perod. I wasted once a shooting day, by bringing only my light weight tripod. I adjust Custom White Balancing on Green and shoot in Raw. Know that anything containing chlorophyll will be strangely white, and water or blue sky is usually nearly black. So look for green. You may be surprised that some ordinarily dull scene becomes interesting and full of life in infrared, moving cars and tourists disappear. Work with small aperture as IR light is less dispersed in the atmosphere than visible light, thus bringing clarity to full depth pictures. The blue hour is from morning to evening, no need to get up early. Lifeview works with an 60Da and R72, even autofocus works with enable exposure simulation.
 I have learned some have trouble with Custom White Balancing, particularily with LR but am afraid I can bring little enlightening to this, except that it works with PSE12, Canon DPP and Canon Raw (without JPG), stored white balance, automatic TV with a Canon 5D and 60Da. I guess the key is – is it possible to save / store the settings in the camera. There are some remarks in the book of Cryll Harnischmacher “unfortunately not any camera does take this white balance on the first attempt“. One serious youtube tutorial doubts correct LR and Photoshop handling IR Raw handling with Channel switching. This problems do occur but not with PSE and DPP. Here is a screenshot (of course, not IR) an unchanged RAWs – without a filter – in PSE. “Green” WB is accepted without complaint when I put in PSE WB on daylight, the image is correct. With the filter unaltered RAW IR images already look pretty OK.
POST PROCESSING
In every case post-processing of the the image is needed Perform each step as indicated below.
Color infrared one-click post-processing method
This is the quick and instant method. Open your image in Photoshop and go to Image> Auto Tone. Look at the difference this one click makes! In fact Auto Tone should be the first thing you do to all your infrared images. The result has a variety of textures and colors for interest. However you may want to further process it.
Color infrared gradient method
After you apply Auto Tone, you can also apply a Gradient Layer and set the blending mode to Soft Light, or Hard Light – you’ll need to experiment a bit depending on the tonal qualities of your original image. You can also adjust the opacity of this gradient layer. If you are familiar with layer masks, you may want to mask out any areas where the gradient might be too strong.
lTo add a Gradient Layer, go to your Layers palette, and click on the new layer icon at the bottom (it’s the one that looks like a sheet of paper with the corner turned up) or you can use the keyboard shortcut Shift+Ctrl+Alt+N. I find it quicker to use the icon in this case. While this new layer is active, go to the Tools palette and select the Gradient tool. On the context menu on top of the window you’ll see the Gradient library and you can select your pre-set gradient from there.
Now, back on your layer, drag your mouse to get the gradient on your image. Select the blending mode to soft light or hard light and then adjust the opacity. This is where your artistic eye comes into the picture. Play around with these settings until you have something you like.
Using the Camera Raw filters and the Channel Mixer
One of the key concepts in infrared photography is to have a very distinct separation of color tones between the sky, and your high infrared reflecting subjects. This is usually the grass and foliage in your scene, or it could be buildings or other subjects that reflect infrared light because of their paint or construction materials. But it’s important to have this separation because you need the sky to be dark, and you’ll want the foliage to be light, if not pure white.
Happily, in Photoshop you can give a tonal boost to your images in a couple of way,s in addition to the Auto Tone setting. After you’ve applied Auto Tone, look for the Camera Raw Filter under Filters. In the Camera Raw Filter, to get this color separation between the light and dark areas of your image, use the the Basics filters and HSL/ Greyscale Slider to adjust the colors until you get a clear difference between the cyan and red shades. Now to the Channel Mixer Go to Image>Adjustments>Channel Mixerchannelmixer. Here we will “swap” the channels to get a nice blue sky and red or purple, and in a few quick steps, white foliage. There is a clear color difference now between the blue sky and the red foliage. It doesn’t matter if the foliage of your image is purple and the sky blue, as long as you can see a clear difference in colors with the sky having some shade of blue.
Now the last part. Go back into your Raw Filters, and in the Basic panel, move the White Balance Color Temperature slider to the left to get a nice blue sky. In the HSL/ Greyscale tab, use the sliders in the Saturation tab to desaturate the colors of your foliage.
Instant Black and White infrared processing
This is a “quick and dirty” method for getting the classic infrared look from your captures. You’ll get the tell-tale light colored foliage, and dark skies. For best results your image should have a clear sky with some clouds for effect. Overcast skies detract from the image, leave things without enough contrast, and very flat. No clouds make the sky seem like a vast black void – not too interesting.
- Open your image in Photoshop
- Go to Image>Auto Tone
- Next go to Image>Adjustments>Channel Mixer>Black and White with Red Filter (From there you can adjust the sliders to get the effect you want)
- To get the classic infrared glow, check to make sure that in the Tools palette the colors are set to the default – black foreground and white background. To be sure, a simple way to set this is to hit the letter D to reset the colors to the default state.
- Then duplicate your layer (Ctrl J), and go to Filters>Filter Gallery>Artistic>Diffuse Glow
- In the Diffuse Glow filter, set the sliders so you can see some halo glows around the white areas of your image. You will have to adjust these to suit your image but it will create the classic graininess and glow of film infrared photos.
Advanced Black and White infrared processing
This is the method I use most for processing Black and White infrared images. It’s easy and it gives you far more control of your final result.
- Open your image in Photoshop
- Go to Image>Auto Tone
- Now create an adjustment layer for Color Balance.
- Layer> New Adjustment Layer> Color Balance
Again, the idea is to get as much color distinction between the sky and any foliage. Color Balance provides an addition method of doing this – in Black and White processing, as well as for color.
Automated Photoshop Action
I found an automated Photoshop action that will perform a transformation attempting to get more on the real side (sort of).
Step 1 – Open the image in Photoshop and sharpen in Raw
Step 2 – Open the channel mixer
Step 3 – Under the Red output channel, move the Red slider to 0 and the Blue slider to 100
Step 4 – Under the Blue Output channel move the Blue slider to 0 and the Red slider to 100
Step 5 – Use the Auto Levels function on the Background Copy layer
Step 6 – Here we can see the false colors really starting to form and create a pleasing image. Next, create a new Hue/Saturation layer
Step 7 – Reduce the Reds saturation to about -85
Step 8 – Reduce the Magenta saturation to about -45. You can achieve some interesting effects by changing the Hues and Saturations
Step 9 – Finally, change the Hue/Saturation layer type from Normal to Color.
I usually lower the saturation und twiddle the light. Here are some results:
-
- il tempo nell’istante in cui si pone lo sguardo tutto è già lontano. Antonio De Simone the time the instant which raises the gaze to everything already far away.
Useful resources
Digitale Astrophotographie, Cyrill Harnischmacher
http://thepluginsite.com/