
I decided to add a new DSLR specialized for Astrophotography. Following a compilation of Canon 60Da Settings for Astrophotography; My intention is to note down a starting point; after that they could go on and modify them per their needs, imaging results, and experience.
SLR has live view, the 10x magnification of which is excellent for focusing on bright stars and planets. It also includes a 1,040,000 pixel, 7.5cm tilt-and-swivel review screen. This is a useful feature if you intend to attach the camera to a telescope.
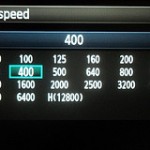
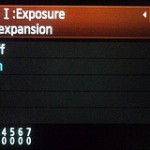
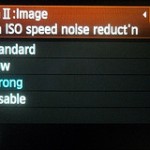
Changing the camera’s ISO alters the amplifier gain, which is used to stretch the recorded signals. Unfortunately high ISO values also amplify image noise. In earlier models, using an ISO higher than 1600 produced images that had significant background noise – they were a bit of an acquired taste. The ISO range in the 60Da runs from 100 up to 6400 with a switchable extension to 12800.
Wide-field shots of the Milky Way passing through Cygnus and down towards Sagittarius, taken using my 28mm f/2.8 lens, were quite acceptable up to ISO 6400. At ISO 12800 there was some detail loss and noise present, but the results weren’t terrible. The upside of this is that it’s possible to take decent wide-field, non-trailed, short exposures of our Galaxy with the camera mounted on my fixed tripod.

ModifiedResult_20130329_16er_60Da_
On ISO 3200, I took some test shots (only 3! 30 sec without darkframe) of the Eskimo Nebula through an Schmidt-Cassegrain mirror telescope (40 cm f/4000 cm). The Eskimo Nebula (NGC 2392), also known as Caldwell 39, is a bipolar double-shell planetary nebula (PN).
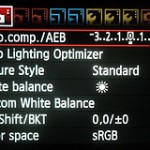
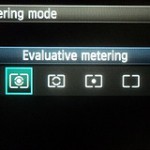
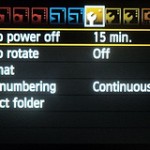
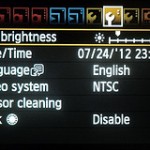
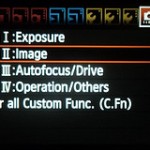
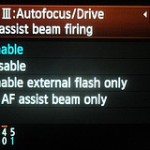
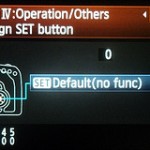
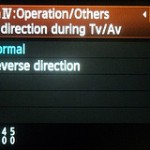
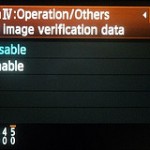
Note: Predominant number of settings are default with few customizations for astrophotography & convenience.
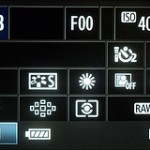
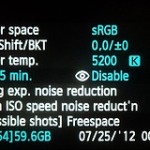
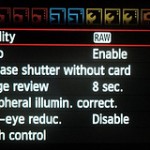
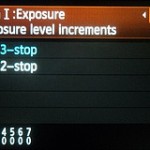
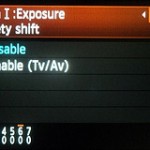
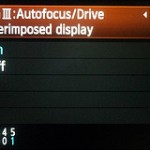
High ISO speed noise reduction = DISABLE
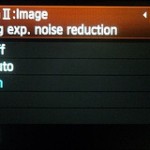
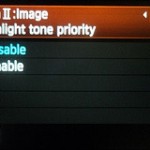
Long exposure noise reduction = OFF
ISO = 800 or 1600 (any lower will require longer exposures; 3200 starts to be grainy)
Auto power off = DISABLE
RAW is self-explaining. Switch the beep off.
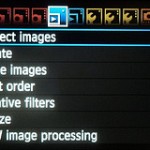
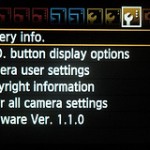
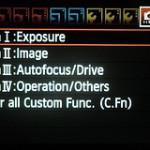
Note: Predominant number of settings are a default with few customizations for astrophotography & convenience.
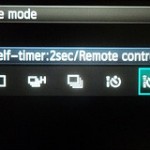


Planetary Movies
I am not sure if you need a 60d to do that but live-view is nice.
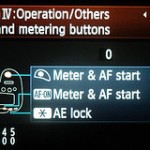
Note: Settings that were modified (from their defaults) are as follows:
1. Movie exposure
2. Movie rec. size
3. White balance
It might be useful to enable live view simulation although I like it more to auto. Live view simulation will show you what the video will look like as you adjust ISO and TVshutter speed.
One might consider the Magic Lantern add-on (see here). Its config presets are great for this::
Movie Menu:
FPS override: 2 fps, Optimize for Low Light (for live focusing and framing in LiveView even with only fainter stars in the screen!)
Shoot Menu:
Intervalometer: On
Take a pic every: 2m5s
Start trigger: Hold Half Shutter
Start after: 10s
Bulb Timer
Expo Duration: 2m
Mirror Lockup: Always ON
Display Menu:
LV display gain: 2EV
Advanced Settings:
Color scheme: Dark Red
I shoot 2m subs the most often (that’s the max I can go with my non-guided setup) that’s why I have the interval period and bulb time set the way they are. Replace with you’re own preferences there.
I use FPS override of 2 fps, this seems to be pretty good compromise between responsiveness and exposure duration. For (f/5) for faster f ratios you might be able to up it a little, for slower you might have to make it even slower. There’s usually always at least a handful of stars that are easy to see, which is also great for perfectly framing your target (if you have a reference/mental image of where the bright stars are in the field of your subject, for M42 and M31 I can actually see the core in LV with this setting)


